

Dream effect means we must be able to fantasize something about the impossible possible and applied to a unique photo. The technique used a lot, so I was saying must first understand the tools in photoshop.
All images can be downloaded supporters. Click image to enlarge tumbnail then right click> Save File


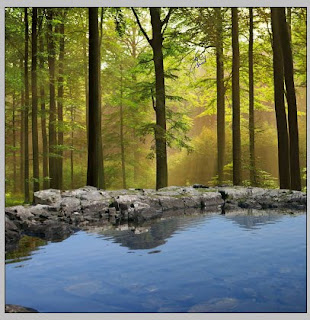
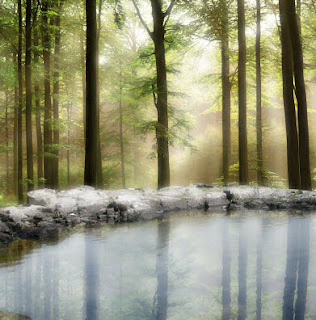
ok now we start it .. forests provide a picture like this:

His canvas Enlarge .. click Image> Canvas size
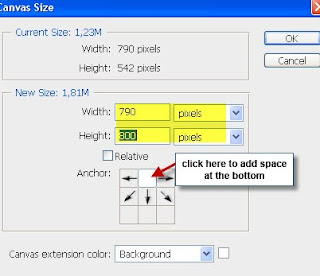
perbesarannya results like this

now open the picture of the lake, and then drag it into the forest picture

Selection section in the red mark

Then press DELETE
Now we create the shadow tree, duplicate the background layer by pressing ctrl + J, save duplicated layer at the top.

Click Edit> Transform> Flip Vertical then changed its opacity

Selection of red-marked images

Press DELETE and the results

up here Could? already started to look good right ..
now make the image as if the waves .. Click Filter> Distrort> Ripple

Combine all the layers by pressing CTRL + E from the start at the top layer ..

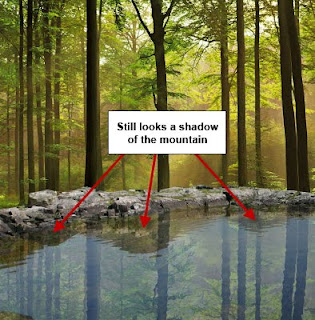
shadow image of his mountain was still visible .. okay .. 'll also masked
we make dream effects .. using the diffuse glow .. Press CTRL + J to menduplikat background layer .. Click Filter> Distort> Glow diffuse.

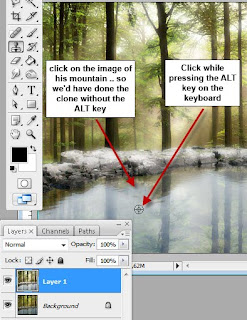
Now use the clone tool technique to remove the shadow of the mountain pictures
Results after the Clone
Until here has to look good right? hehehe ..
now let's move on ..
click Image> Adjustment> Brightness / contrast

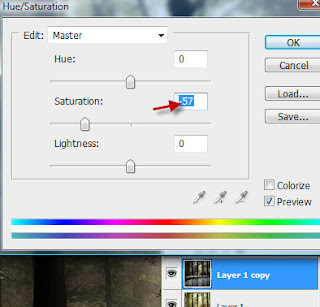
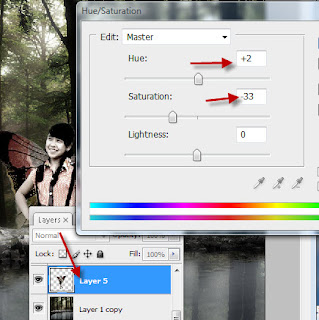
click Image> Adjustment> Hue / Saturation
Open the file and selecting Butterfly girl with pen tool
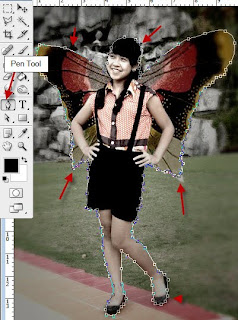
How to make Butterfly Girl I have not been posting here who can please make first ..
Right-click the already selected> make selection

Click Select> Modify> Feather

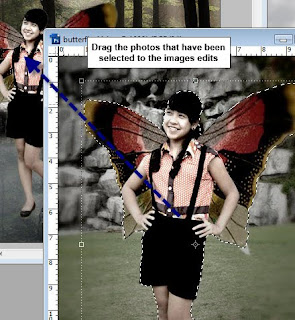
Drag the photos that have been selected into the forest picture
Click Image> Adjustment> Hue / Saturation
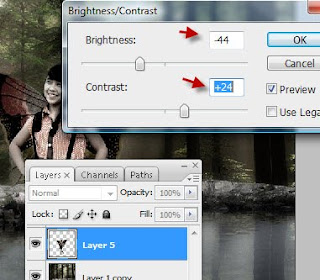
Click Image> Adjustment> Brighness / Contrast
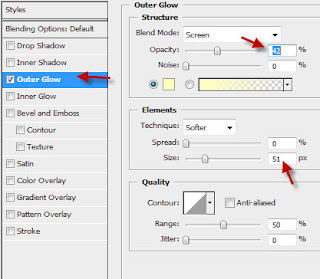
Right-click the layer or layers butterfly girl 5> Blending Options or double click on the layer 5
We make it a bit bright people.
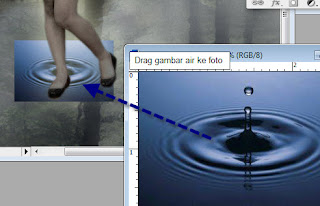
Now make as if his feet into the water .. so there must be a wave
open water and then drag the image to the image edits were
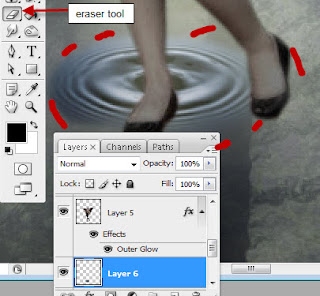
arranged in such a way .. then remove the edges so that no plasticity box.
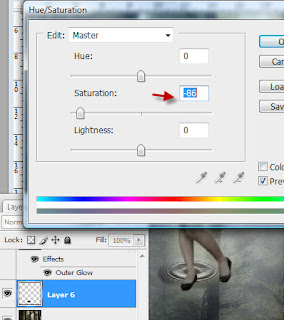
Click Image> Adjustment> Hue / saturation for water ..
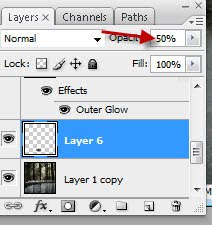
Make it into Opacity 50%
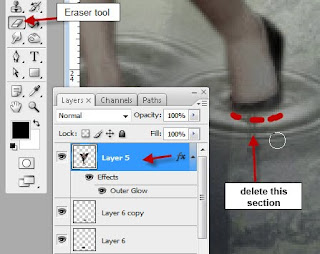
Delete some legs now I'll look into the water
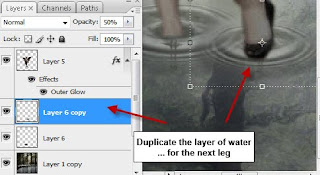
Duplicate the wave of water and place it in the next leg
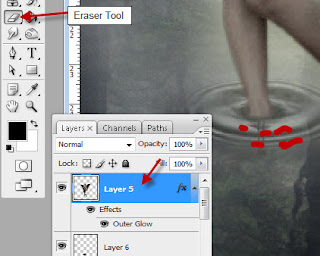
I'll remove the legs into the water looks
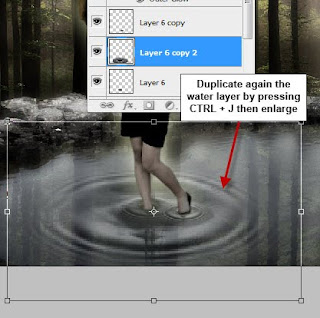
Duplicate again .. the water wave by pressing CTRL + J.. and larger ..
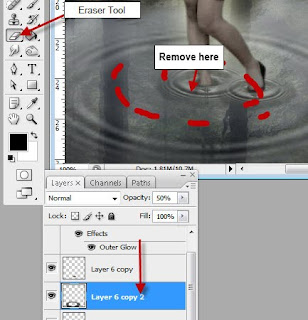
Remove the center of a large water waves with eraser tool
Create a shadow of his people .. he made the same way each time create shadows of trees .. and result
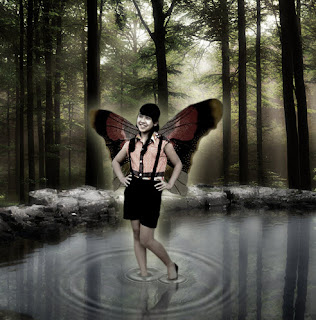
How? confused you? Try to keep up can!!
Good luck ..

His canvas Enlarge .. click Image> Canvas size

perbesarannya results like this

now open the picture of the lake, and then drag it into the forest picture

Selection section in the red mark

Then press DELETE

Now we create the shadow tree, duplicate the background layer by pressing ctrl + J, save duplicated layer at the top.

Click Edit> Transform> Flip Vertical then changed its opacity

Selection of red-marked images

Press DELETE and the results

up here Could? already started to look good right ..
now make the image as if the waves .. Click Filter> Distrort> Ripple

Combine all the layers by pressing CTRL + E from the start at the top layer ..

shadow image of his mountain was still visible .. okay .. 'll also masked

we make dream effects .. using the diffuse glow .. Press CTRL + J to menduplikat background layer .. Click Filter> Distort> Glow diffuse.

Now use the clone tool technique to remove the shadow of the mountain pictures

Results after the Clone

Until here has to look good right? hehehe ..
now let's move on ..
click Image> Adjustment> Brightness / contrast

click Image> Adjustment> Hue / Saturation

Open the file and selecting Butterfly girl with pen tool

How to make Butterfly Girl I have not been posting here who can please make first ..
Right-click the already selected> make selection

Click Select> Modify> Feather

Drag the photos that have been selected into the forest picture

Click Image> Adjustment> Hue / Saturation

Click Image> Adjustment> Brighness / Contrast

Right-click the layer or layers butterfly girl 5> Blending Options or double click on the layer 5
We make it a bit bright people.

Now make as if his feet into the water .. so there must be a wave
open water and then drag the image to the image edits were

arranged in such a way .. then remove the edges so that no plasticity box.

Click Image> Adjustment> Hue / saturation for water ..

Make it into Opacity 50%

Delete some legs now I'll look into the water

Duplicate the wave of water and place it in the next leg

I'll remove the legs into the water looks

Duplicate again .. the water wave by pressing CTRL + J.. and larger ..

Remove the center of a large water waves with eraser tool

Create a shadow of his people .. he made the same way each time create shadows of trees .. and result

How? confused you? Try to keep up can!!
Good luck ..


